
A Family of Three Diagnoses with Liver C@ncer, Doctor Furious as He "Accuses" Two Foods in the Fridge as the Culprits
Life Tips 13/06/2025 22:24
Grout lines are often the most overlooked part of our tiled surfaces, yet they can accumulate dirt, grease, mildew, and stains over time. In areas like kitchens and bathrooms, where moisture is high, grout can quickly become darkened, dirty, and difficult to clean.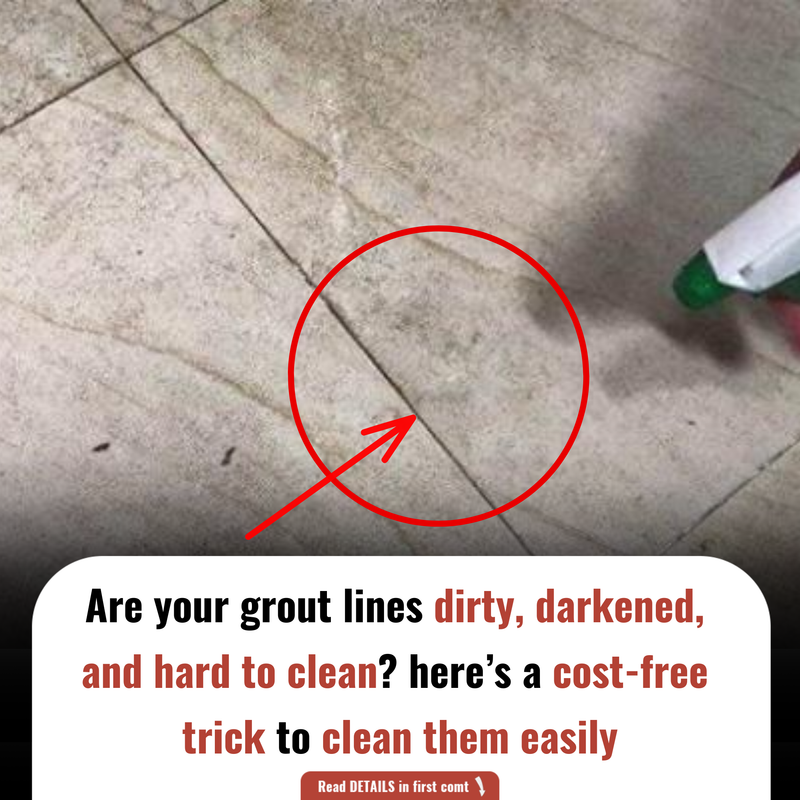
The good news is that you don't have to spend a lot of money on commercial cleaners or hire professional services to restore the cleanliness and brightness of your grout. There’s an easy, budget-friendly solution that can work wonders using ingredients you likely already have at home.
In this article, we'll show you how to clean grout lines with simple, natural ingredients that are not only effective but also eco-friendly and safe for your home.
The Problem with Grout Lines
Grout lines are the cement-like material between tiles that can trap dirt and moisture. These lines are often porous, making it easy for grime to seep in, and when exposed to moisture over time, mildew and mold can begin to develop. The result is a grimy, dark appearance that can make even the cleanest tiles look dirty.
The challenge with cleaning grout is that it’s not just about surface dirt—over time, stains can set in, making the grout appear permanently discolored. You may have tried scrubbing with harsh chemicals, only to find that the stains persist, or even worse, your grout has become more stained than ever.
So, what can you do to restore your grout lines without breaking the bank on expensive cleaners or resorting to harmful chemicals? The answer lies in a simple DIY solution using common household items that you already have in your kitchen.
DIY Grout Cleaner Solution: How to Clean Grout Naturally
To create your own grout cleaning solution, you’ll need the following ingredients:
Baking Soda: A natural mild abrasive, baking soda is great at lifting stains and scrubbing away grime without damaging your tiles.
White Vinegar: Known for its disinfecting properties, white vinegar also acts as a powerful stain remover and can break down grease and soap scum that accumulates in grout lines.
Dishwashing Detergent: This ingredient will help break down oils and grease, making the overall solution more effective at tackling stubborn stains.
Step-by-Step Instructions for Cleaning Grout Lines
What You’ll Need:
1 spray bottle
2 caps of baking soda
4 caps of white vinegar
1 cap of dishwashing detergent
Water
Steel wool pad or brush
Clean cloth
Instructions:
Prepare the Cleaning Solution:
In your spray bottle, combine the following:
2 caps of baking soda
4 caps of white vinegar
1 cap of dishwashing detergent
Fill the rest of the bottle with water (about 2/3 full).
Shake the bottle well to mix all the ingredients thoroughly.
Apply the Solution:
Spray the cleaning solution generously onto the grout lines, making sure to cover the entire surface of the grout.
Let the solution sit for 5 to 10 minutes. This will allow the vinegar to work on breaking down the stains and grime.
Scrub the Grout Lines:
After the solution has had time to sit, use a steel wool pad or a brush to scrub the grout lines. Make sure to scrub up and down along the joints to lift the dirt.
The mild abrasiveness of baking soda will help scrub away the stains without damaging your grout.
Wipe Clean:
Once you’ve scrubbed all the grout lines, use a clean cloth to wipe away the solution and any debris.
If necessary, repeat the process in areas that are still stained.
Rinse and Enjoy:
After wiping down the grout, rinse the area with clean water to remove any residue from the cleaning solution.
Allow the grout to dry, and you’ll notice it looking brighter and fresher.
Additional Tips for Tough Grout Stains
Let It Sit Longer: If you have stubborn stains that don’t come off easily, don’t be afraid to let the solution sit longer—up to 15 minutes. The longer the solution sits, the more effective it will be in breaking down tough grime and stains.
Tackle Mildew and Mold: For grout that has been affected by mildew or mold, add a few drops of tea tree oil or hydrogen peroxide to the solution. These ingredients have natural antifungal properties that will help eliminate mold growth without using harsh chemicals.
Routine Maintenance: Regularly cleaning your grout can prevent the buildup of stains and grime. Try to clean your grout lines every couple of weeks to keep them looking fresh and clean. This will save you from needing heavy-duty cleanings down the line.
Why This DIY Grout Cleaner Is Effective
This homemade grout cleaning solution is highly effective because it uses natural ingredients that break down the substances causing the stains. Baking soda is gentle enough to scrub away dirt without scratching the grout, while white vinegar works as a natural bleach alternative, killing germs and stains. The dishwashing detergent helps break down grease and oil, which are often the culprits behind grime buildup.
By using this solution regularly, you can maintain your grout’s cleanliness without resorting to expensive commercial cleaners or harsh chemicals.
Conclusion
Grout lines can easily become stained and grimy, but with a little care and the right ingredients, they can be restored to their former brightness. The DIY grout cleaner solution described here uses simple, safe ingredients you already have at home, and it’s both effective and eco-friendly.
The key to clean grout is regular maintenance and immediate cleaning when stains start to form. With this simple DIY method, you’ll be able to maintain beautiful, fresh grout lines without breaking the bank or using harmful chemicals. By following these simple steps, you can enjoy clean, bright tiles in no time.


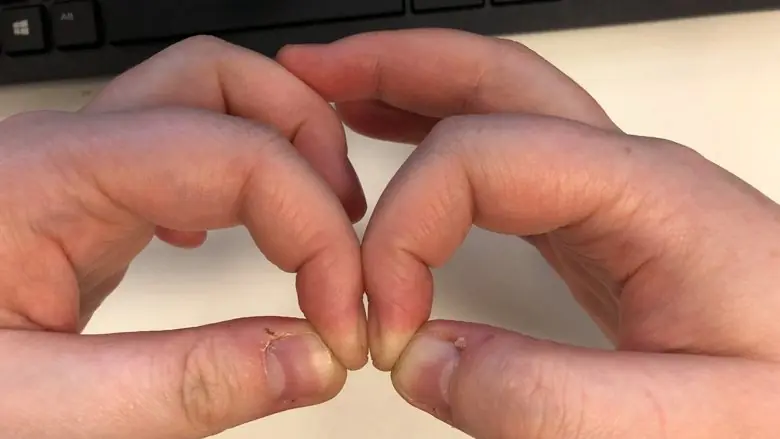
A simple finger test, known as the Schamroth window test, can help detect signs of lung c@ncer and other health conditions, including heart problems. Learn how to perform this easy test at home.


Discover the powerful benefits of honey, cinnamon, turmeric, apple cider vinegar, and chia seeds. Learn how this natural blend can improve digestion, stabilize blood sugar, and enhance bone and heart health.


Discover why your underwear may have bleach-like stains and why it's completely normal. A gynecologist explains the role of vag!nal discharge and how it can affect your underwear fabric. Learn when to be concerned and how to maintain vag!nal health.
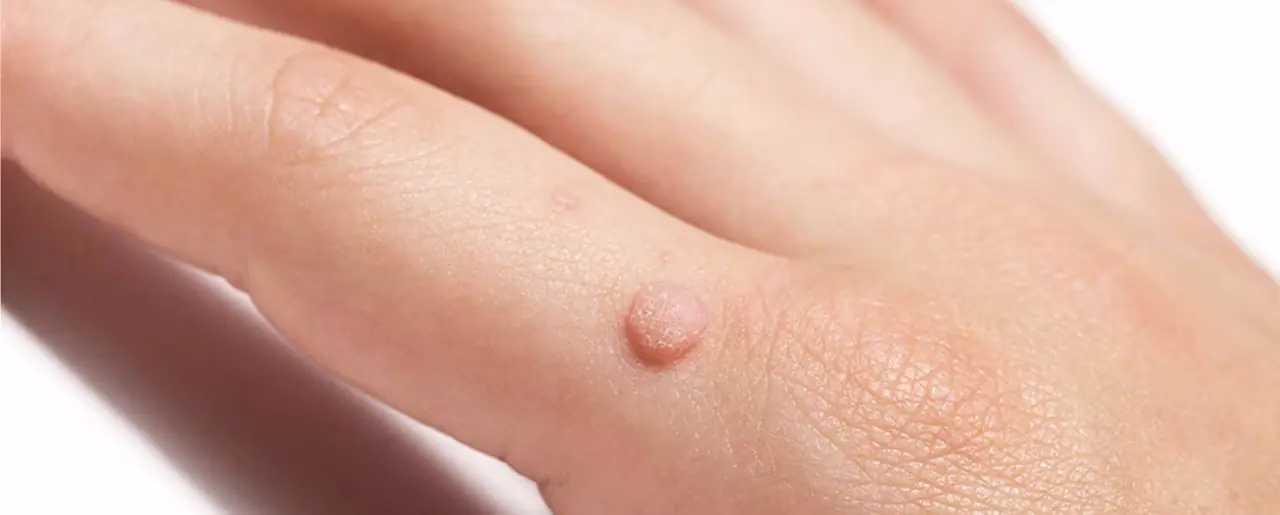
Discover effective methods for removing warts on your fingers, from at-home remedies like salicylic acid and duct tape to professional treatments. Learn how to identify, treat, and prevent warts with expert advice.


After inheriting $670K, my husband quit his job without warning, thinking we were set for life. But I had a lesson in store for him. Discover how I turned the tables and showed him the real cost of laziness and entitlement in marriage.

My boyfriend’s constant pressure to get me to go to the gym made me question our love. Read how our conflict over body image and fitness almost ruined our relationship and what we learned about true acceptance and love.

My MIL acted like my pregnancy belonged to her: she painted the nursery without asking, smoked stinky herbs to ‘ensure a boy,’ and bossed me around daily. But when I gave birth to a girl, her cruel reaction made me smile… Because I was ready.

My girlfriend quit her job to become a T!kT0ker, and I ended up working two jobs to support us. Read how social media dreams can destroy relationships and the heartbreaking consequences of love and sacrifice.

A tense family conflict forces Tina to confront her sister-in-law's cruelty and stand up for her place in her own family, leading to a powerful and emotional realization about love and belonging.

A woman faces emotional turmoil as her partner pressures her to change her appearance for the sake of his family's approval. In a world where self-love is key, she learns the hard way that true love starts with loving yourself.
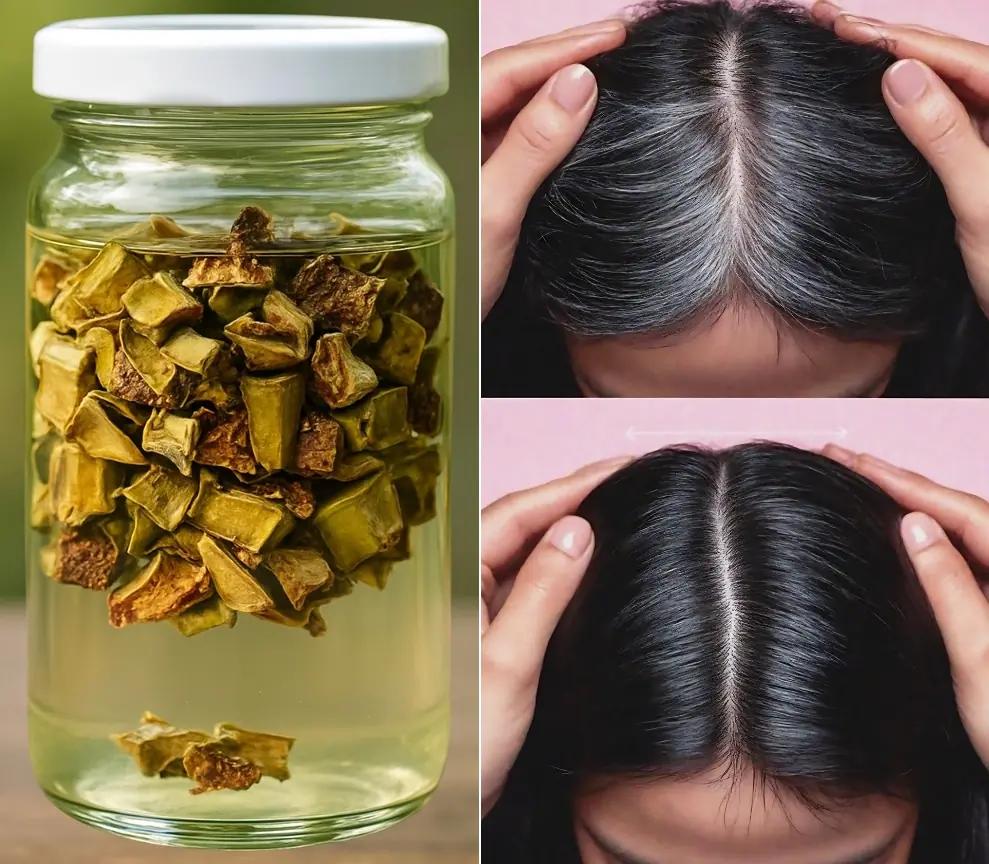
The onion juice, black seed powder, and henna remedy offers a safe, effective, and affordable way to address grey hair and improve overall hair health.

Garlic oil is a powerful, natural remedy for various hair concerns. Its ability to promote hair growth, reduce dandruff, and strengthen hair makes it an excellent addition to your hair care routine.
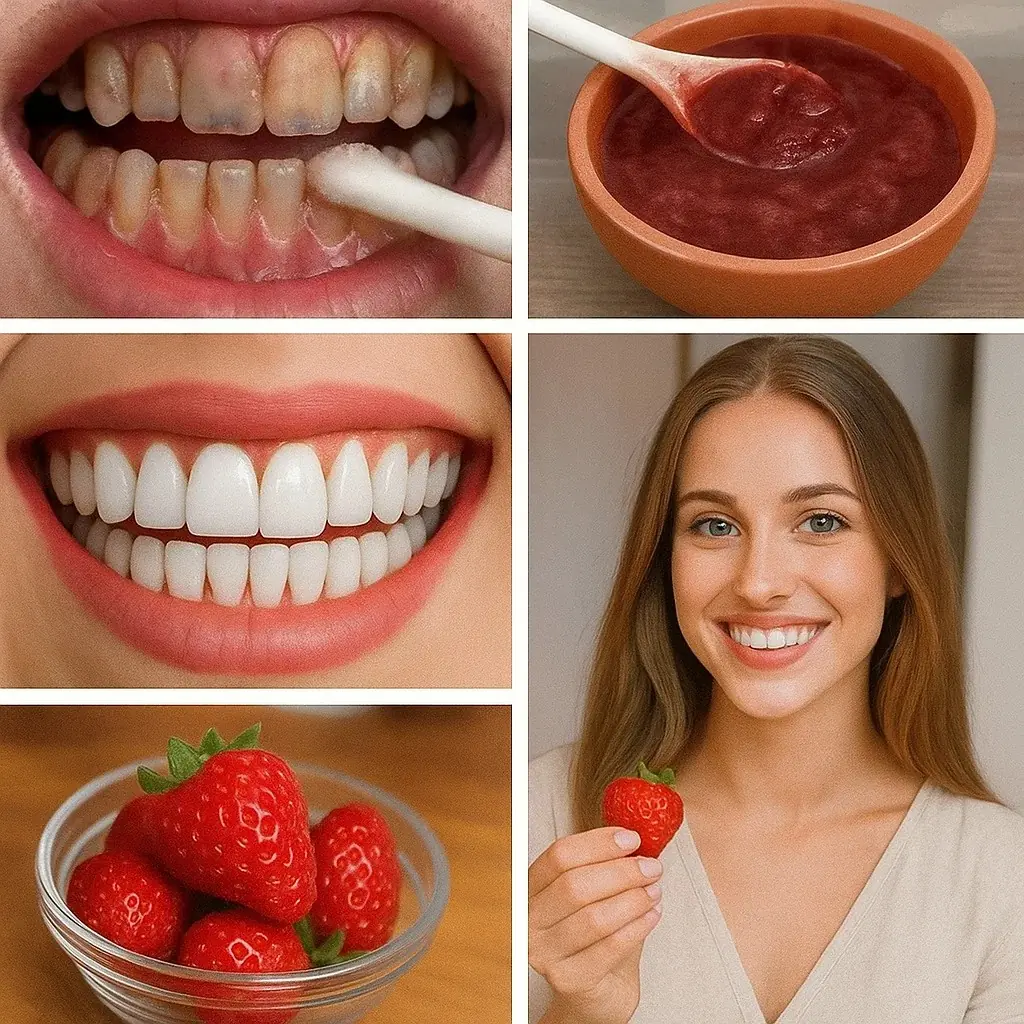
The potential risks of enamel erosion and the limited whitening power make this DIY remedy a less-than-ideal choice for those looking for long-term, safe, and effective results.
These simple recipes use natural ingredients that are easily accessible and provide multiple skin benefits, including brightening, exfoliating, and nourishing.

After facing buIIy!ng for her unique style, a 6th-grade girl found her voice and confidence again through crochet. Discover this inspiring story of artistic triumph, self-expression, and how handmade passion can build an empire, one stitch at a time.

On June 12, a family’s dream of a new life in London ended tragically in a plane crash. Discover the emotional story of Pratik Joshi’s family, their dreams, and the reminder that life is fragile.
By incorporating these simple DIY toners into your daily skincare regimen, you can achieve smoother, clearer, and more radiant skin without the need for expensive products.

A heartfelt and emotional journey of love, heartbreak, and self-discovery. When your partner is still hung up on their ex, is it worth fighting for the relationship? Discover the painful truth behind choosing yourself over unrequited love.