In the world of hair care, achieving smooth, silky, and healthy hair is a common desire. Unfortunately, with constant exposure to heat styling tools, chemical treatments, and environmental pollutants, many of us struggle with frizzy, coarse, or damaged hair. While salon treatments offer temporary fixes, they often come with hefty price tags and chemical formulations that can further harm the hair over time.
If you're looking for a natural, affordable, and effective alternative to harsh chemical treatments, a natural keratin treatment at home may be just what you need. This treatment can help restore your hair’s natural smoothness, boost its shine, and protect it from further damage. In this article, we will introduce a simple yet powerful homemade keratin treatment using a surprising natural ingredient - okra. Rich in nutrients and natural compounds, okra (or ladyfinger) can be your ticket to achieving straight, healthy, and frizz-free hair.
Understanding Keratin and Its Role in Hair Care
Before we dive into the specifics of the natural keratin treatment, let's take a moment to understand what keratin is and why it’s so crucial for your hair.
Keratin is a fibrous protein that makes up the structure of your hair, skin, and nails. It acts as a protective barrier, keeping your hair strong and preventing damage from environmental factors, heat styling, and chemical treatments. However, over time, the keratin in your hair can break down due to factors like age, pollution, poor nutrition, and the excessive use of hair styling products.
When your hair lacks keratin, it can become frizzy, brittle, and dull. This is why many salon treatments use keratin-based products to restore the health and shine of the hair. But why spend a fortune on keratin-infused products when you can achieve similar results naturally at home?
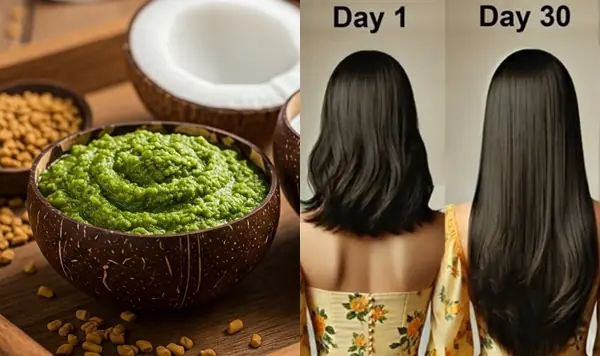
The Power of Okra: A Natural Keratin Booster
Okra (also known as ladyfinger or bhindi) is a vegetable that is not only a kitchen staple but also a beauty powerhouse. It is rich in essential vitamins like A, C, and K, as well as minerals such as calcium, iron, and magnesium. These nutrients make okra an excellent choice for promoting healthy hair growth and improving the overall health of your hair.
The sticky mucilage that okra releases when heated is packed with natural proteins that mimic the properties of keratin, helping to smooth and strengthen hair strands. It also hydrates the hair, making it more manageable and less prone to frizz. With regular use, okra can improve the texture of your hair, making it smoother, shinier, and more manageable.
Now that we understand the benefits of okra, let’s explore how you can use this natural ingredient to create a keratin treatment for your hair at home.
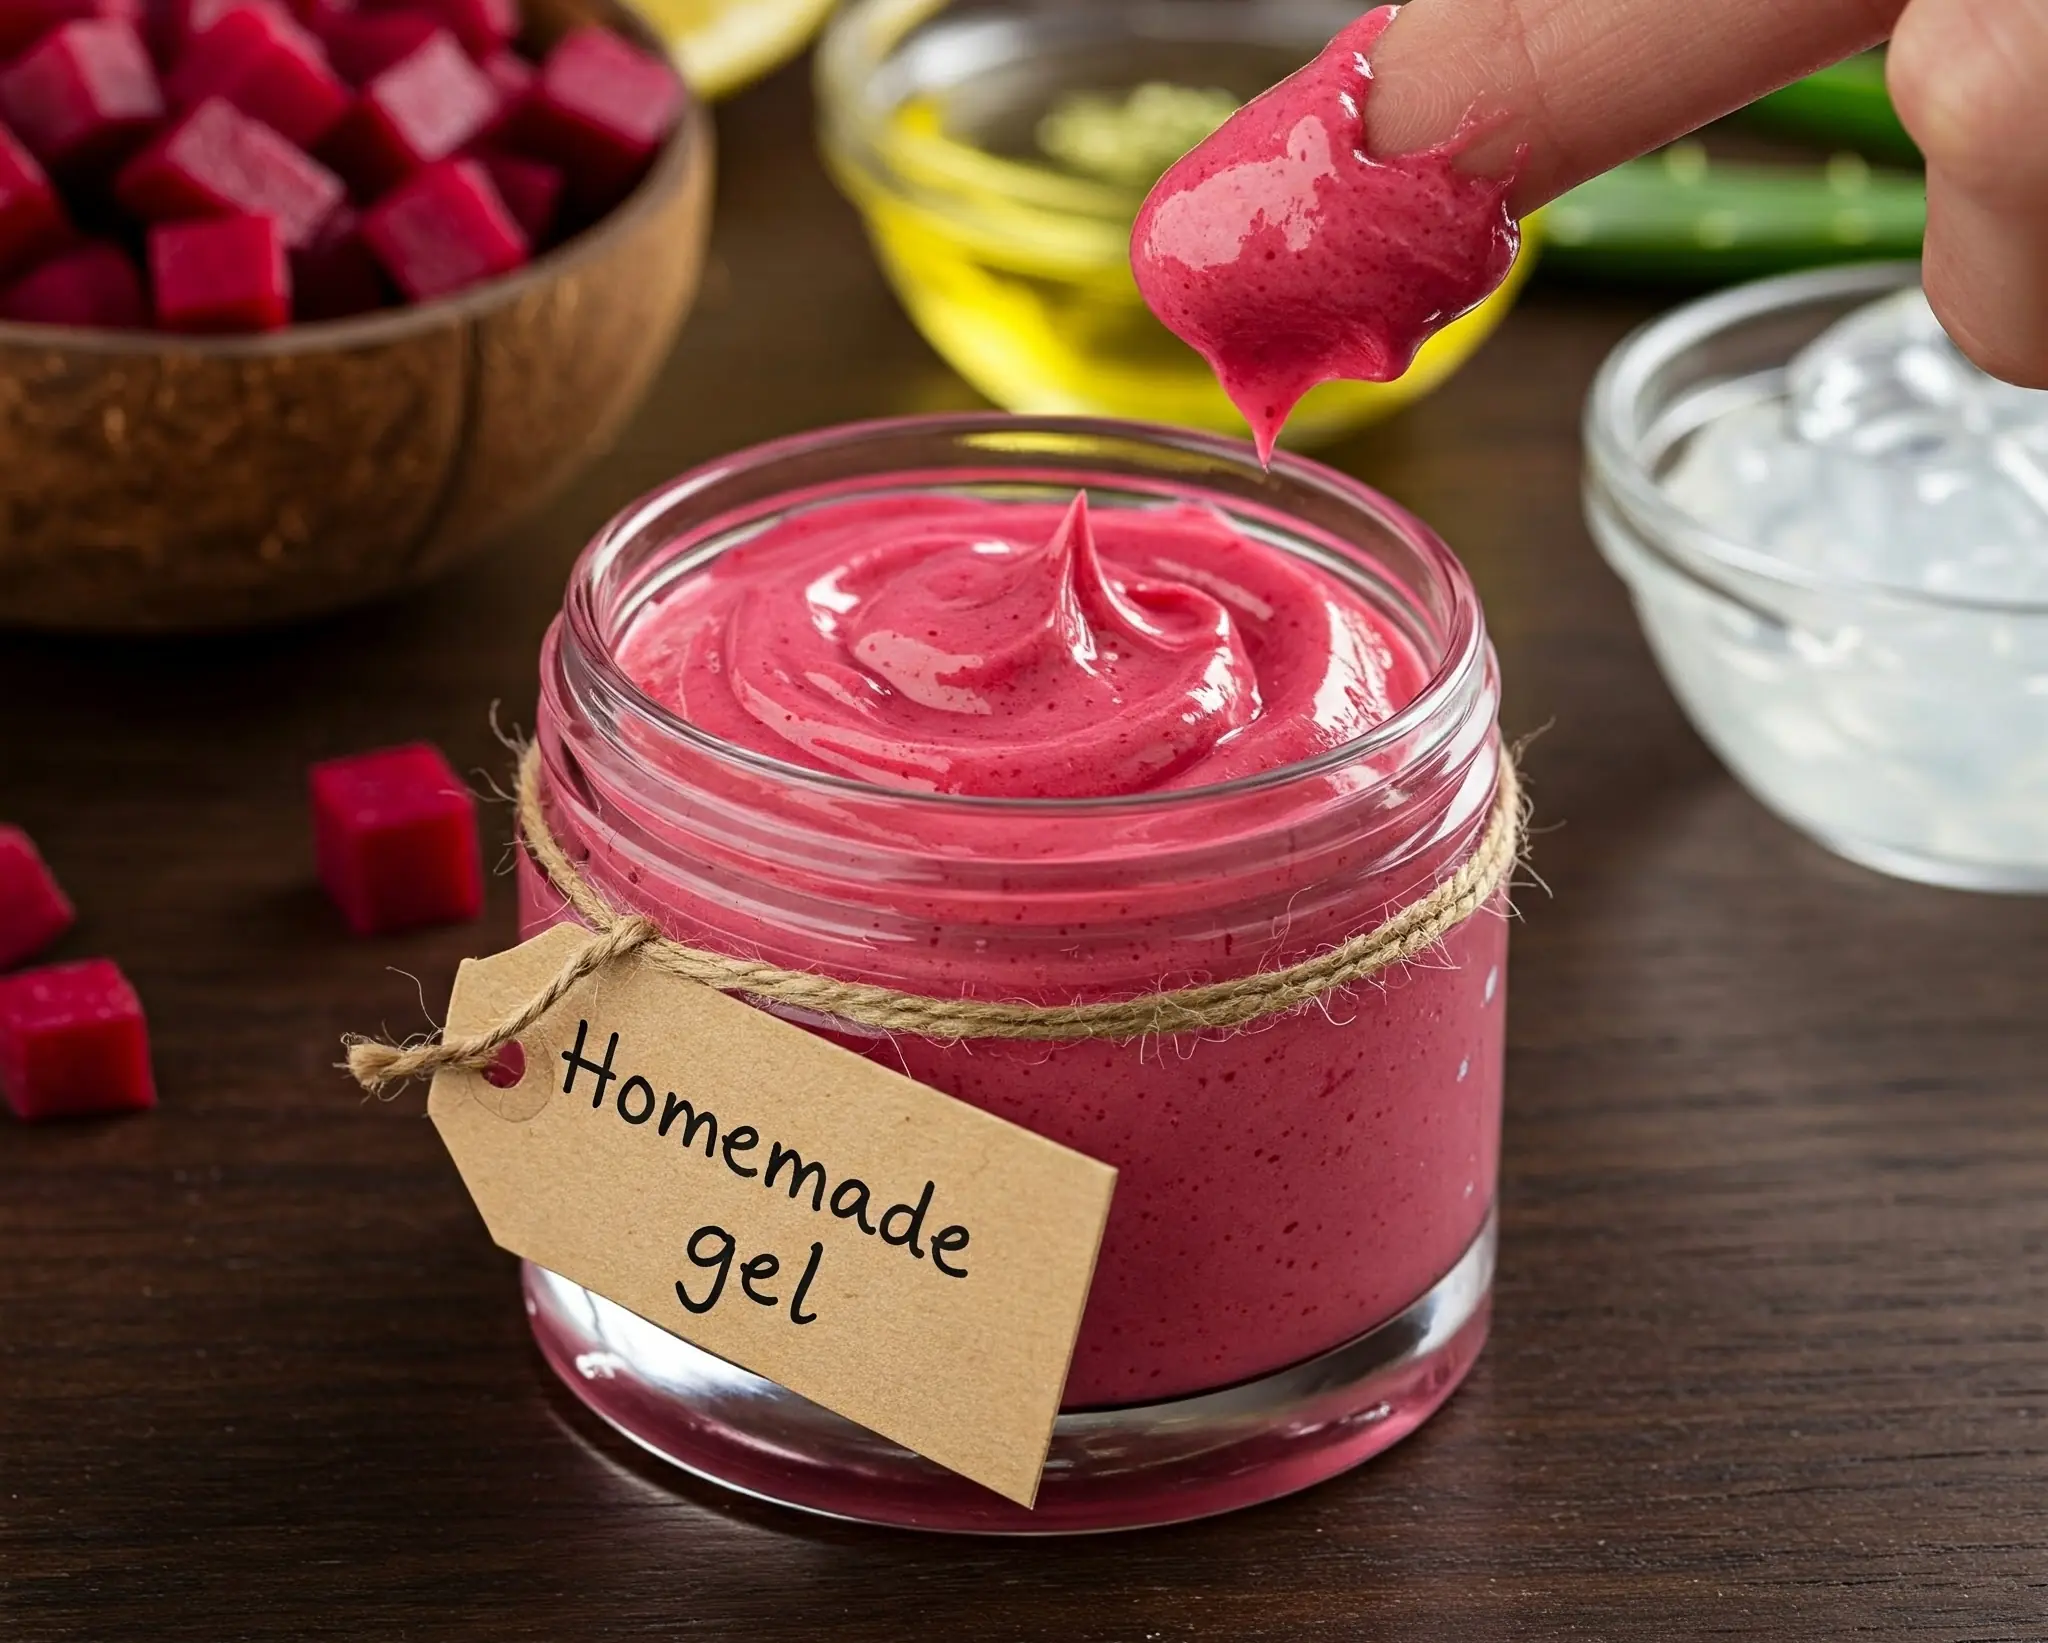
DIY Natural Keratin Treatment with Okra
Ingredients for Homemade Keratin Treatment
-
4 okra pods (also known as ladyfinger or bhindi)
-
1 cup of water
-
1 tablespoon of cornstarch
-
1/4 cup of water (for cornstarch mixture)
-
1 tablespoon of almond oil
-
1 tablespoon of coconut oil
Step-by-Step Instructions for Making the Keratin Treatment
-
Prepare the Okra:
-
Start by thoroughly washing 4 okra pods under running water to remove any dirt or impurities.
-
Cut the okra into small slices to maximize the release of mucilage (the sticky substance that holds the nutrients).
-
-
Boil the Okra:
-
Place the sliced okra into a saucepan and add 1 cup of water.
-
Boil the mixture for about 10 minutes, allowing the okra to release its mucilage and other nutrients. If necessary, add more water to maintain the consistency.
-
-
Cool and Blend:
-
Once the mixture thickens and becomes sticky, turn off the heat and allow it to cool down completely.
-
Blend the cooled mixture in a food processor or blender to create a creamy consistency. You may also use a wooden spoon to mash it if you prefer a more natural method.
-
-
Strain the Mixture:
-
To remove any solid bits of okra, strain the mixture using a fine mesh sieve or gauze. You should be left with a smooth, gel-like texture.
-
-
Prepare the Cornstarch Mixture:
-
In a separate bowl, mix 1 tablespoon of cornstarch with 1/4 cup of water to create a smooth paste.
-
Add this cornstarch mixture to the okra gel, and blend well to combine. The cornstarch will help thicken the gel and give it a more consistent texture, similar to commercially available keratin treatments.
-
-
Add Nourishing Oils:
-
Add 1 tablespoon of almond oil and 1 tablespoon of coconut oil to the mixture. Both oils are rich in essential fatty acids and vitamins that nourish and strengthen the hair, preventing damage and adding shine.
-
-
Let the Mixture Rest:
-
Once all ingredients are thoroughly mixed, cover the mixture and allow it to sit for 7-8 hours to allow the oils to fully infuse and the consistency to thicken further.
-
How to Use Your Homemade Keratin Treatment
Now that you’ve made your natural keratin treatment, it’s time to apply it to your hair. Follow these simple steps to ensure that you get the most out of this treatment.
Application Method
-
Section Your Hair:
-
Start by dividing your hair into several sections. This will allow for more even application and ensure that the treatment reaches every strand.
-
-
Apply the Keratin Treatment:
-
Take a generous amount of the homemade keratin mixture and apply it evenly to each section of your hair, starting from the roots and working your way down to the tips.
-
-
Massage into Scalp and Hair:
-
Gently massage the treatment into your scalp and through your hair to ensure that every strand is coated. This will help the treatment penetrate deep into your hair follicles, improving the strength and texture of your hair.
-
-
Cover with a Shower Cap:
-
Once your hair is fully coated, cover your hair with a plastic shower cap. This will help trap heat, allowing the treatment to penetrate more effectively.
-
-
Leave On for 2 Hours:
-
Let the treatment sit for 2 hours. During this time, the okra, oils, and cornstarch will work together to hydrate, smooth, and strengthen your hair.
-
-
Rinse Thoroughly:
-
After 2 hours, rinse your hair thoroughly with lukewarm water. Do not use shampoo immediately, as the treatment is meant to nourish and hydrate your hair, and shampooing too soon could strip the hair of its natural oils.
-
-
Dry and Style:
-
Allow your hair to air dry, or blow-dry on a low heat setting if preferred. You should notice smoother, shinier, and healthier-looking hair right away.
-
The Benefits of Natural Keratin Treatments with Okra
Using okra as part of your keratin treatment offers a variety of benefits for your hair. Here's why this natural remedy is so effective:
1. Strengthens Hair:
-
The protein-rich mucilage in okra helps strengthen your hair strands, preventing breakage and split ends. This makes okra an ideal remedy for those with fragile or damaged hair.
2. Adds Shine and Luster:
-
The combination of almond oil and coconut oil in this treatment helps to add shine to your hair, making it look more radiant and healthy. Regular use can restore the natural luster of your hair, making it more vibrant.
3. Promotes Smoothness and Manageability:
-
Okra contains natural oils and amino acids that help smooth the hair cuticle, reducing frizz and leaving your hair looking sleek and silky. If you have coarse or frizzy hair, this natural keratin treatment can work wonders.
4. Prevents Hair Loss:
-
By strengthening the hair follicles and improving scalp health, okra helps prevent hair loss. The amino acids in okra promote collagen production, which is essential for maintaining healthy hair.
5. Hydrates and Conditions:
-
Okra’s high water content acts as a natural moisturizer, keeping your hair hydrated and soft. It also helps seal in moisture, preventing dryness and ensuring your hair feels nourished.
Additional Tips for Maximizing the Effects of Okra-Based Keratin Treatment
While the homemade keratin treatment works wonders on its own, there are a few additional tips to ensure you get the best results:
1. Consistency is Key:
-
To achieve the best results, repeat the treatment once or twice a week. Regular application will ensure long-term improvements in hair texture and strength.
2. Combine with a Healthy Hair Care Routine:
-
Pair this natural keratin treatment with a healthy diet rich in vitamins and minerals to support hair health from within. Vitamins such as biotin, Vitamin E, and Vitamin D are essential for strong, healthy hair.
3. Use a Silk Pillowcase:
-
To avoid further damage to your hair while you sleep, consider switching to a silk pillowcase. This will reduce friction and prevent breakage, allowing your hair to stay smooth and healthy.
4. Be Gentle with Your Hair:
-
Avoid using heat styling tools excessively. Instead, try to air dry your hair or use a cool setting on your blow dryer to minimize damage.
Incorporating natural keratin treatments into your hair care routine is a fantastic way to achieve healthier, smoother, and more manageable hair. Okra’s protein-rich mucilage offers an effective, natural solution to frizzy, damaged hair without the harmful chemicals found in many commercial products. By following this simple DIY recipe, you can restore your hair’s natural strength and shine, improve its texture, and even promote hair growth.
So, if you're tired of battling frizzy, coarse hair and want a more natural and effective solution, try making this homemade keratin treatment with okra and see the results for yourself. With consistent use, you'll enjoy silky, healthy hair without the need for expensive salon treatments. Embrace the power of nature and transform your hair naturally!